Saturday, 30 June 2012

Christmas Bauble


I know it's only June but you can never begin Christmas preparations too early!
For this tree bauble I used the ornament punch to cut lots of shapes from real red designer paper, old olive card and red glimmer paper. I folded them all in half and stuck them all together to create a three dimensional bauble.  I attached a loop of ribbon in the centre so I can hang it on my tree.


OK that's one down, loads more to go, phew it's a good job Christmas is still 6 months away!

Friday, 29 June 2012

Forked bow!


This bow is made using a fork! I won't try to explain how but I am sure there are lot's of tutorials to be found on the internet, I guess you could use a bow maker too. 
The ribbon nicely covers the edge of the designer paper and the bow sits on top.  The flower is made from two Mixed bunch blooms, the top layer has had the individual petals cut to the centre which adds some 3D interest and a touch of bling in the centre from a rhinestone.  The greeting is from the curly cute stamp set.

Thursday, 28 June 2012

Rock and roll, Vintage Vogue and a Faux Bow!


Another pretty bow taught to me by Amanda. However this one isn't really a bow it just looks like one and the beauty of this one is that it lies so flat that it will easily go through the post, alternatively you could add lots of extra layers and colours to it and really go to town. 
The stamped image is using the Vintage Vogue flowers and I used the rock and roll technique to get the two colours.  First I inked up my stamp with the paler pretty in pink colour and then carefully rolled the edges of the stamp on the rose red ink pad so that colour was only added to the edge.  

Wednesday, 27 June 2012

Simply Happy Birthday


Simple designs are often the most striking I think.  This stamp is available exclusively to hostesses and is part of a larger set of 11 stamps called Happiest Birthday Wishes.
The base card is Peach parfait and I coloured the stamp with marker pens in various colours that would coordinate with the peach.  I didn't have any peach ribbon so I added another strip of card along the bottom of the card and echoed that on the insert.  Then I thought I was done so I took my photograph but looking at it later I decided that it was missing a little something. 3 Rhinestones on my peach strip was what it needed :)


Tuesday, 26 June 2012

Bordering on Romance


Hello, I'm back from a fabulous weekend away crafting :) I will share what I made later in the week but for now I have a card using the lovely Bordering on romance stamp set that is available from Stampin' Up's  current mini catalogue.  
The image has been stamped and coloured with blender pens or you could use watercolours for an even softer effect, hmm I may have a go with that later on. I used the embossing frames around the image and cut it out, I haven't used the frames much yet but I like this effect. Now, do you like my bow? I so struggle with tying a neat bow sometimes it can be a bit hit and miss but Amanda showed me a new technique. I punched a hole in the base card and threaded my ribbon around the card and through the hole before tying the bow. Neat huh!

The Cupboard Trilogy: The count down is on ......

The Cupboard Trilogy: The count down is on ......

Have you seen the Craft Cupboard Trilogy challenge Blog?  They are currently revamping and relaunching the blog and in honour of this they have some lovely blog candy to give away.  You can see the blog here.


Monday, 25 June 2012

Bright Blossoms


I think this is becoming one of my favourite colours to work with, I'm so glad we will have Island Indigo as one of the Stampin Up In-colours for another year yet.
This card showcases one of the new stamp sets from the summer mini catalogue and to make best use of it's components it's a good idea to use the stamp-a-ma-jig to make sure they line up perfectly. The Bright Blossoms stamps were coloured using marker pens and stamped onto whisper white card. The designer paper is from the new Twitterpated suite, another new favourite, the coordinating ruffled ribbon sets it off just right, not a bow this time but a neat knot.

Awesome Weekend

Wow! What an awesome weekend I had!!

Rock of Ages at the theatre was simply brilliant, we had great seats and I think I sang all the way through the whole show.

Then the following morning I was up at the crack of sparrows and off to Worthing on the south coast to meet up with the other ladies for a whole weekend of crafting.


Here are some of the ladies busy with their projects, wave to Brigitte!


and here is the other end of the room.  We all had plenty of table space to work on but at the same time were close enough to chat easily.


This is El's inspiration board filled with beautiful samples and below is my table space partway through the weekend.  I did have plenty of room really but I am a messy crafter and end up with stuff everywhere :/ 

I took some of my own projects to work on but El also had some gifts and projects for us too. When I get around to photographing them properly I will share them with you here.

Friday, 22 June 2012

Pretty Pink bow


I am so excited! Last month for my birthday my husband bought us tickets to see Rock of Ages and tonight's the night! It's a show I've wanted to see for a long time and I'm so looking forward to it.
If that wasn't enough I also have a great weekend ahead of me too.  The first half of this year had been quite rough for our family and when the opportunity arose for me to have a whole weekend away crafting I grabbed it with both hands. So, I am off to Worthing in the morning to join some crafting friends. I wonder how much I will get done or if I will spend more time chatting than cutting and sticking!
Anyhow, I do still have a card to share with you today.


This is a very pretty colour combination of wisteria wonder, pretty in pink and whisper white.  The background mat was run through the Big Shot in the polka dots embossing folder and a faux bow made from pretty in pink satin ribbon has been attached to the card front using a designer printed brad. The focal point is punched from the mixed bunch stamps, one in wisteria and one stamped. Add a pink circle punched from the centre of the flower and add a touch of bling with a rhinestone.

Wednesday, 20 June 2012

Scoring for decoration


Your Simply scoring board is not just for creating boxes and envelopes, here I have used it just to add some decoration to my card. You can't see it very well in the photograph I will have to try and get a close up but I have scored 3 parallel lines both above and below the flowers. The flowers are from the Boho blossoms punch and have rhinestones in the centre. Rich Razzleberry has always been a favourite of mine and I love this combination of razzleberry, Melon Mambo and chocolate chip. 

Tuesday, 19 June 2012

Waterfall card


The beauty of the Simply Scoring Board is that you can make an envelope to match your card in any paper you like and to whichever size you require.  Amanda showed us how with this design.  The card is a waterfall design with the edge randomised by the stamping and some ribbon to hold it closed for sending. 


The envelope is made to measure in colour coordinating designer paper.

Monday, 18 June 2012

A Simply Scored gift packet


Today I have another Simply Scored project, I learned this one at Amanda's class last month and it could be just the ticket for present a small gift by adding a cellophane bag to the inside. It really is incredibly simple to make but looks oh so pretty, A strip of card decorated by stamping, scored in just the right places and folded. Another piece of coordinating card to make a cover, holes punched right through, including a cellophane bag if required and some ribbon threaded through to hold it all in place.  The gift tag and the stamps are from Mixed bunch and punched with the matching punch.

Saturday, 16 June 2012

Morning Mocha luxury

Well. sadly the Aquazorbing yesterday was cancelled because of the bad weather so we need to reschedule. Trouble is life is so busy at the moment that it may not be for some weeks :/


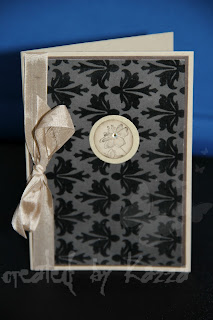
You have to love the elegant luxury of the Morning mocha designer paper, this particular paper is flocked. for this card I have let the paper take centre stage and just added a small element from the simply soft stamp set with a rhinestone and some coordinating crumb cake seam binding ribbon.


Tomorrow is Father's day, think I had better head off and make sure I have everything prepared!

Friday, 15 June 2012

Box - Simply Scored


I am so glad that Stampin Up have now brought us the Simply Scoring Board, it makes creating little boxes so easy. A few simple score lines and we were ready to fold this box from card and the lid from coordinating designer paper. Some satin ribbon to tie it up nicely and it's all ready for your gift. Simples!


I am off shortly for an exciting afternoon.  One of my daughter's birthday presents was an Aquazorbing experience, she and her brother are goign to roll downhill inside a huge plastic ball but just in case that wasn't enough they throw some water inside as well! Fortunately I only have to watch and take photographs, I'll share some with you soon.

Thursday, 14 June 2012

Spotlight technique


I really like his one, I'm sure I will use this technique a lot. Amanda showed us at her class a few weeks back and it's really very simple.  The stamp set is Simply Soft and is exclusive to hostesses, the greeting is from Petite Pairs. to begin with the design is stamped in one colour on a base card then on another piece of card stamp again.  This extra piece needs to be punched or cut, coloured (for this sample we used markers and a blender pen) and then mounted onto a piece of card colour coordinating with the main card base, in this case we used rose red. You could mount it flat or 3d mount it to add some dimension.

Wednesday, 13 June 2012

Inked & Embossed


Another new technique! Well not quite, I have attempted this one once before.  This effect is achieved by taking an inkpad to the inside of an embossing folder before placing the card inside and running through the Big Shot. There are a lot of layers to this card, the pretty in pink base card and then Rose Red designer paper followed by a crumb cake layer and then the embossed layer, the embossing folder is elegant Bouquet. The butterfly was punched from dsp and attached with a rhinestone brad.

Tuesday, 12 June 2012

Stained glass techinique


Lot's of Luck Alice! Today is my daughter's first A level exam this year.  Fortunately they don't last long and it will all be over by the 20th, then we will have the long wait until results day. I shall have to think up lots of things to do so that we can pass those days pleasantly. Like some crafting perhaps?


Does this look familiar?  The design and colour scheme is the same as this card that I blogged at the end of last month but we highlighted a different image.
The technique is different too, this image was stamped onto vellum and then coloured on the reverse with marker pens, the resulting effect is reminiscent of a stained glass window.

Monday, 11 June 2012

Faux silk


A little while back I attended a techniques class run by my upline Amanda and over the next couple of days I will share the cards we made that day.  I learned such a lot that day and hopefully I will be able to share my new knowledge with my own customers and friends over the coming months.

The stamps used for this card are from the hostess gift Simply Soft and from curly cute.  The faux silk effect is created by the use of tissue paper which we stamp on, water colour with an aqua painter and cover with glue before smoothing onto the background card. A touch of grosgrain ribbon to complement the colour scheme. 

Saturday, 9 June 2012

Open Seas


I have a feeling that this is a stamp set that you might see quite a lot of. I have already used it several times and keep coming back to it.  The Open Sea has quite a vintage feel I think and so for this card I made use of that and distressed my papers a little.  The colour combination of Crumb Cake and Marina Mist is one I use a lot too but it works so well!

Friday, 8 June 2012

Rosettes Simply Scored


Woohoo! We now have the Simply Scored Tool to use and it's just brilliant! There are just loads of different ways to use the board and you can add a diagonal scoring plate or a metric plate if you find that easier to use.
This is my first attempt at a rosette, they are so much easier to make than you think.  This one was made from designer paper and scored every quarter inch. Then the strip of paper was concertina'd and the ends joined together to complete the ring.  A circle punched from coordinating paper finishes off the centre.

Thursday, 7 June 2012

Postage stamp tags


Sadly this stamp set is no longer available as it was part of the spring mini catalogue but I thought I would share the design as another stamp set could easily be substituted.  The card makes good use of the postage stamp punch and the tag punch, they enable us to make cards so quick and easily :)

Tuesday, 5 June 2012

Need for Speed


Another stamp set that has been on my wish list since the catalogue was launched last October. It's perfect for the lads in our lives, there's a car, bike, boat or plane for everyone.  I've used the glimmer brads to attach my car to the card and matched them to the colour of my car. The designer paper stack in neutrals is perfect for this monochrome look and I used tiny strips of dsp to make the brackets opposite the brads. 
This design would be great for Father's day I think but maybe not for me this year as I made 40 of these as my swaps for the Reading training!

Monday, 4 June 2012

Blossom


This card was inspired by a swap that I received at the Reading Training day a few weeks back.  It is such a simple design but so striking and it shows off the new Blossom punch and the new Sweet shop designer paper so beautifully.  These papers are just gorgeous, 2 of the designs (one of which is shown here) are embossed and therefore add some lovely texture to your projects.  The greeting is from Petite Pairs and stamped in Wisteria Wonder. Oh and don't forget to add a touch of bling with rhinestones! 

Saturday, 2 June 2012

Flight of the Butterfly


This stamp set has been on my wish list forever and it's another set that has a coordinating punch to go with it. 
My daughter turned 18 in March but for various reasons we couldn't hold her party until mid April and Oh what a great night it was. Lots of family and friends joined us to celebrate and we all danced the night away to the wonderful A-band-on-ship who did indeed abandon their ship for the evening to entertain us.
However, I digress!  Back to the card.  Of course Alice had many thank-yous to send and this, along with yesterdays card, was one of the designs that I made.  This version uses a designer paper that retired from the Stampin' Up! catalogue last year but you could use any coordinating paper to create a similar version.  My colours were Rose red and Marina Mist which are echoed in the dsp and the butterfly is punched and 3d mounted for definition.
Related Posts Plugin for WordPress, Blogger...