Showing posts with label organza ribbon. Show all posts

Monday, 27 May 2013

Secret Garden

Secret Garden is my favourite stamp set at the moment, I am using it A LOT and I love that it has matching framelits which make cutting out the images so easy!  
This card, however, was designed by one of my team Ashee for a shoebox swap that we did at my team training morning a few weeks back. You can see her blog here.
The flowers were coloured using a blender pen and ink from a melon mambo inkpad. Some flowers were adhered flat to the card front and others 3d mounted  to create dimension. The greeting is from Itty Bitty Banners.

Tuesday, 12 June 2012

Stained glass techinique


Lot's of Luck Alice! Today is my daughter's first A level exam this year.  Fortunately they don't last long and it will all be over by the 20th, then we will have the long wait until results day. I shall have to think up lots of things to do so that we can pass those days pleasantly. Like some crafting perhaps?


Does this look familiar?  The design and colour scheme is the same as this card that I blogged at the end of last month but we highlighted a different image.
The technique is different too, this image was stamped onto vellum and then coloured on the reverse with marker pens, the resulting effect is reminiscent of a stained glass window.

Monday, 28 May 2012

Yellow Roses


Another offering from a team training day. Lovely and fresh and springlike. Like yesterdays tortoise the rose is water coloured. The stamp set is Happiness shared and I do like it's simple elegance, it just cries out for some delicate colouring, the organza ribbon just finishes it off nicely.

Sunday, 9 October 2011

Baby Blossoms


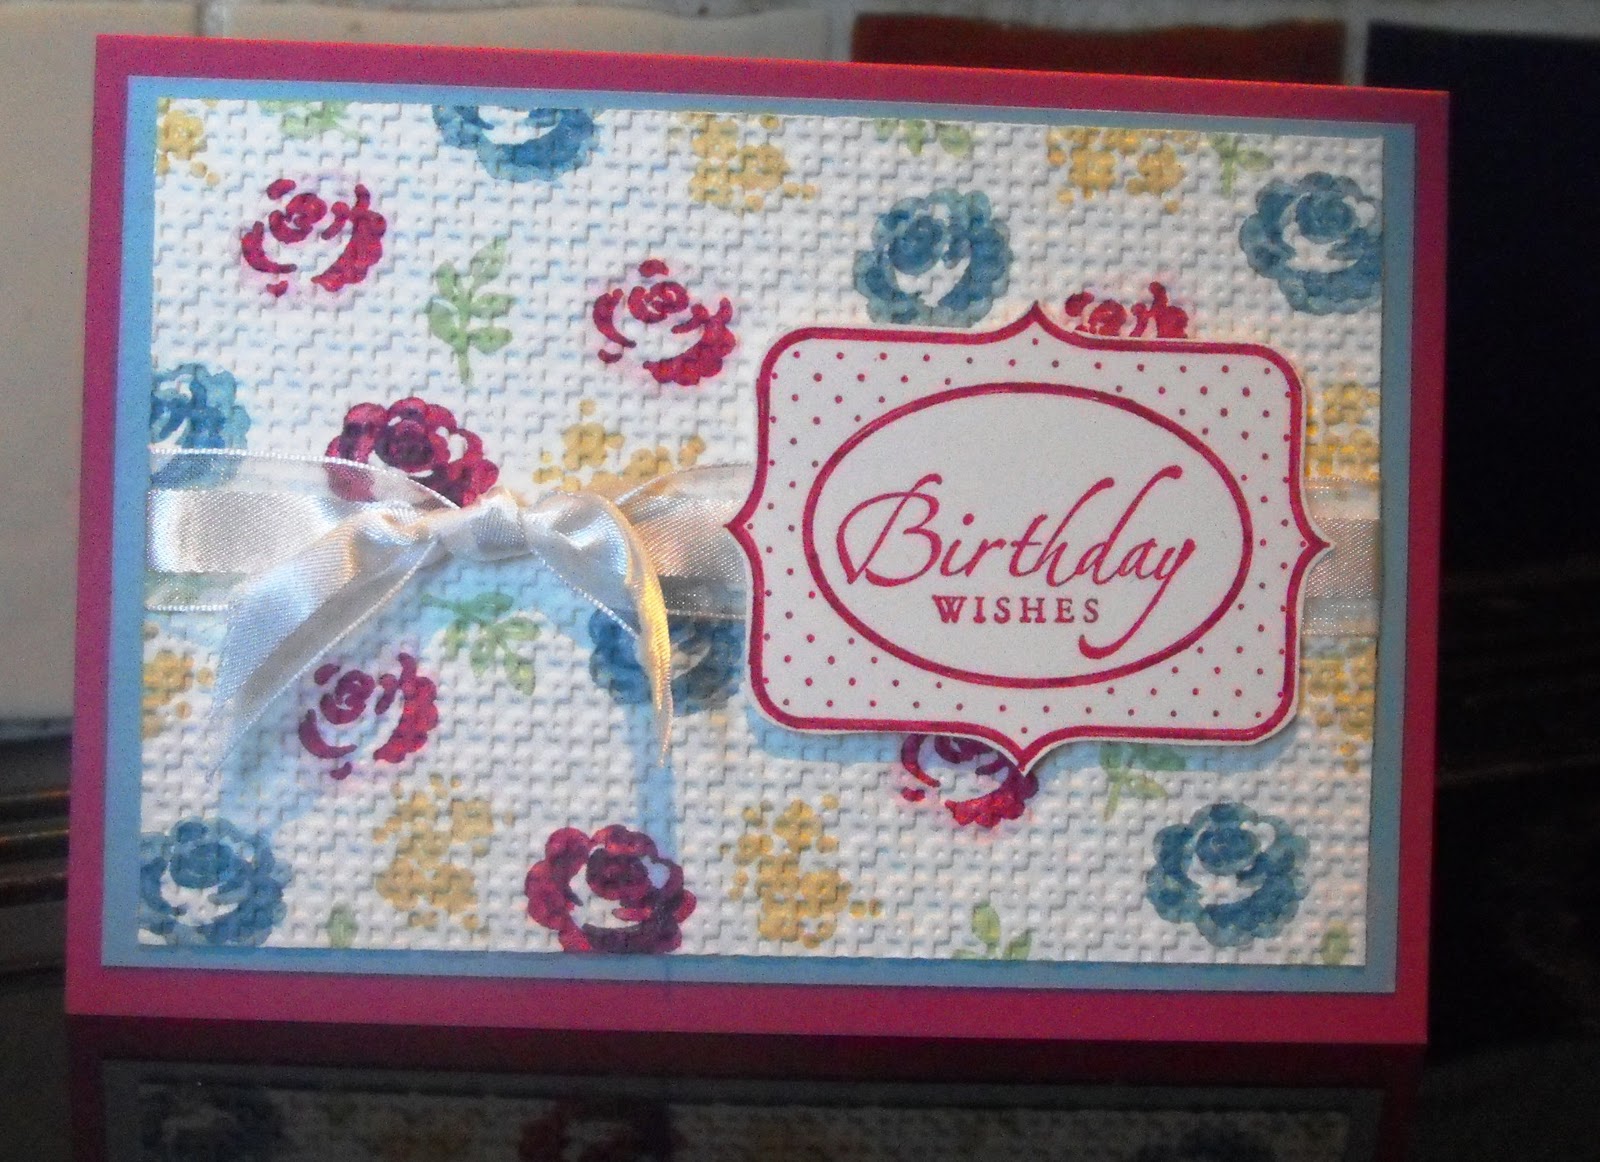
A pretty birthday card today.  The stamp set is Baby Blossoms from the summer mini, a two step stamp set and it is so pretty.  I used marker pens from the subtles series to ink up the stamps, a light colour for the base layer of each flower and then a toning darker colour for the detail.  Once  all the flowers and leaves were in place I used the textured embossing folder in the big shot.  This folder is great, it makes your paper look and feel like a piece of fabric.  I matted onto Baja breeze and then onto the card base of rose red.  I also used rose red ink for the greeting (sincere salutations stamp set) and the frame which I then 3d mounted over the top of an organza ribbon sash.

Thursday, 6 October 2011

Love Hearts


Morning all, what happened to our heatwave then huh?!  It's very definitely Brrrrr round here today. 
This is the last card I have to share from my All Occasions class, can you guess which occasion it might be?!   I would probably use it for Valentines Day but it could be used for an anniversary too I think.
Rose red card stock, designer paper and ink with stamps from the I [heart] Hearts set.  This stamp set is still part of Stampin Up's excellent value starter kit and if you join me during October then there are extra freebies for you too!
I need to get back to making my swaps for the forthcoming team training day on the 15th now.  More tomorrow :)

Wednesday, 5 October 2011

Happy Balloon day!


An offering from the 2010-11 in-colours today. You gotta love concord crush and it goes so well with pear pizazz.  The in-colour designer paper pattern stack was one of the hostess gifts last year and I used it here to make the balloons.  I used a technique called paper piecing; I stamped the image on the card and then again on the designer paper.  I cut the image out from the paper and "pieced" it onto the card.  The sentiment is from sincere salutations and punched using the decorative label punch.  I daubed around the edge in concord ink to soften the edges

Sunday, 2 October 2011

Gift card holder


Day 4:  Do you have teenagers to buy for at Christmas?  I do and it can be really difficult to find them something suitable.  I first made something very similar to this with my lovely upline Amanda and it is just so perfect to jazz up those boring gift voucher cards that I thought I would share it with the ladies at my own class.
It is made using the bigshot and the topnote die btu making it as a folded card.  The Jolly Holiday designer paper makes the pocket on the front for the gift card to slide into and then it is decorated with a fower from the 5 petal punch. some ribbon and a little bling.  The greeting is again from Sincere Salutations

Thursday, 29 September 2011

Baby, baby.


Those of you who came to the All Occasions workshop last weekend will recognise these, I had a great day and hope you did too.  I intend to share the cards that we made over the next few days rather than swamp you with everything at once.
Bashful blue and Pink pirouette lend themselves beautifully to baby cards and of course we made one in each colourway in order to be ready for when the next baby makes it's appearance.  We used the Baby tees jumbo wheel, inked in matching bashful blue or pink pirouette, for the background.  Then we used it again on a scrap piece of white card; we could then decide which design we liked best to make a focal point.  Coloured with markers then cut out and matted onto another piece of whisper white and espresso card with a little sponge daubing to soften the edges.  A sash of organza ribbon to finish.  Perfect to welcome a new arrival.
Related Posts Plugin for WordPress, Blogger...