Showing posts with label Big shot. Show all posts

Wednesday, 17 July 2013

Embossed Vellum


This has to be one of my favouritest ever cards, we made it recently at Make, Do and Send Card club.  It's not my own design, I confess I CAS'ed it completely. 
Take a sheet of vellum cardstock and run it, together with an embossing folder, through the Big Shot. Attach the vellum along one edge to your base card, you can cover the glue with ribbon.  Then we added some butterflies made from Designer series paper using the Beautiful Wings embosslits and finished off with a touch of bling by adding a rhinestone.

Tuesday, 18 June 2013

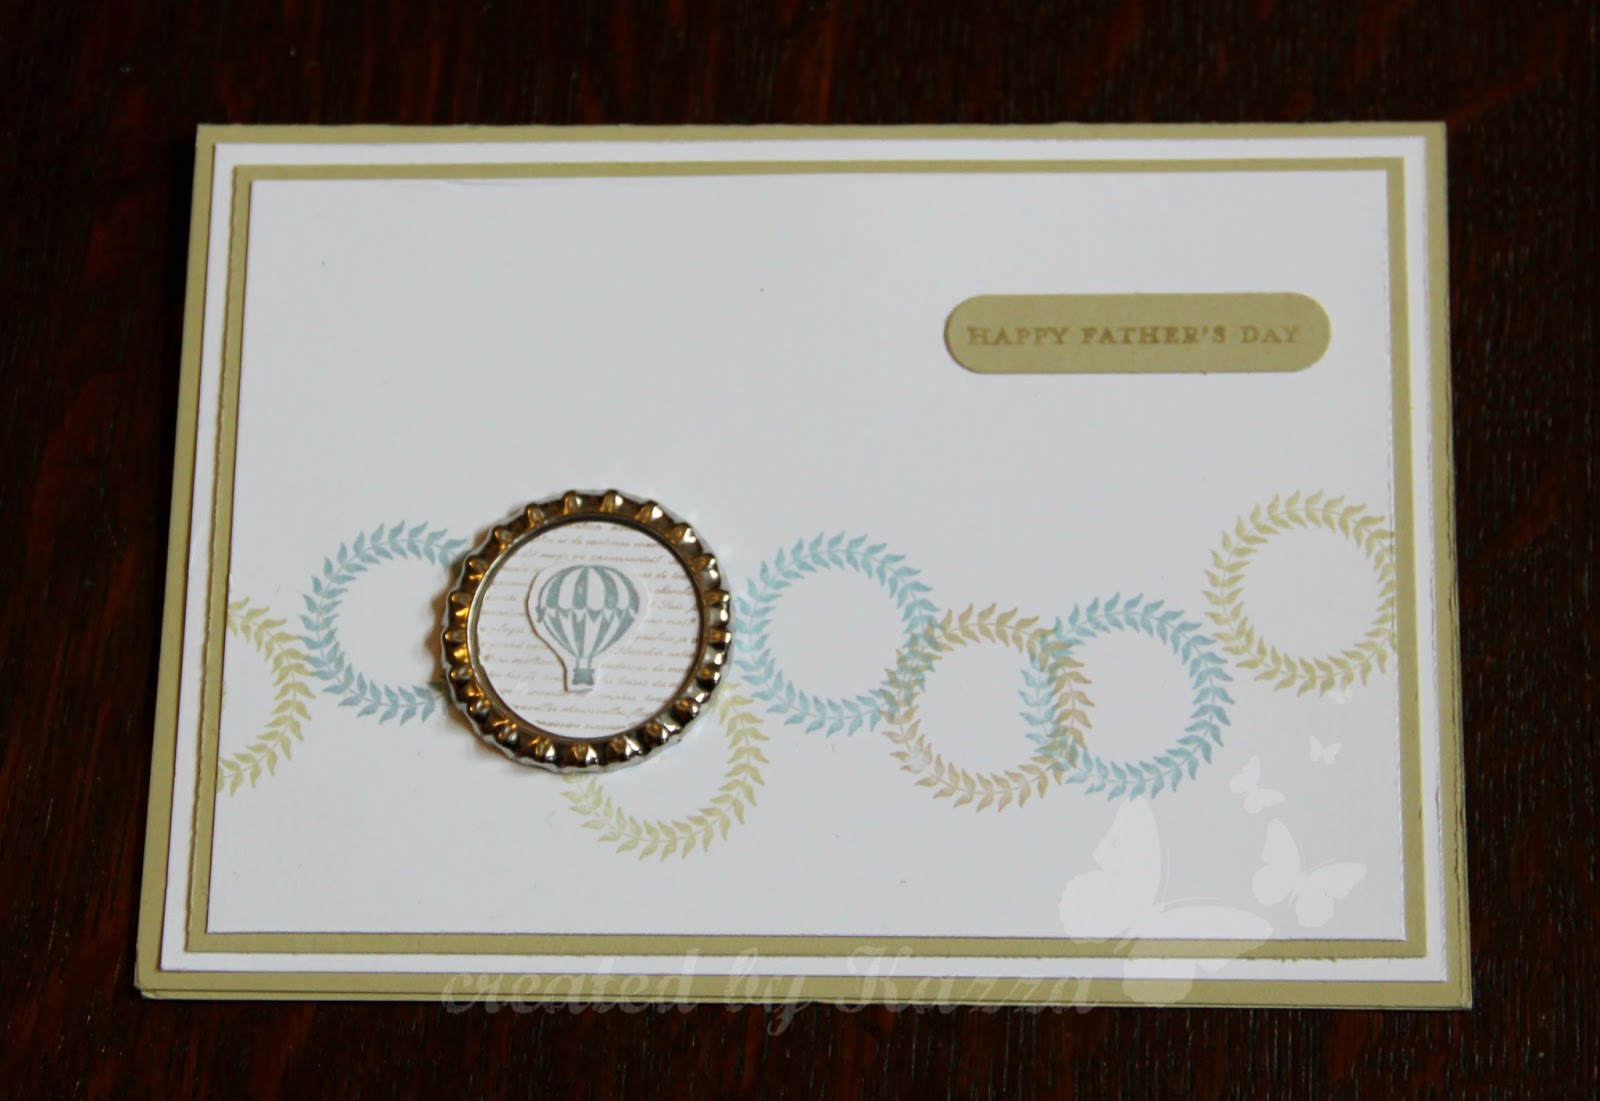
Bottle Tops!


I'm loving the new soda pop tops from Stampin up!  You can use them as they are or "squash" them as I have done here using the Big Shot. The larger ones are perfect for a 1" punched circle to fit inside so I utilised an image from Collage curios for this card. The colours are River Rock and Baja Breeze.

Monday, 10 June 2013

Pop up Dress Up


This gorgeous pop up card was designed by Amanda Fowler and we made it at one of her recent classes.  The dress form is perfect for this pop up design which is all cut out easily using the Big Shot.  A touch of designer paper makes a beautiful dress and some silver glimmer paper a perfect mirror.


Here is a better look at the inside of the card and aso ofthe lovely two-tone ribbon used as a closure.

Wednesday, 5 June 2013

BIG Flower


We made this card at a recent team training day, the combination of lucky limeade and tangerine tango is very bright and cheerful.
The flower has been cut using the Big Shot from designer paper and layered up then finished with a pearl.

Tuesday, 4 June 2013

River Trip


Well, it looks as though Summer may at last be on the way! These photos were taken when we hired a boat on the Thames last Summer, we had such a lovely day in the sunshine.
I love the combination of Summer Starfruit and midnight muse, it works really well for layering.  I also layered the frames for the smaller photos, it makes them look a little like portholes.

Thursday, 30 May 2013

Banners


This is a great way to use up some of those scraps of designer series paper that you have hanging around.  Yes, we all have them, can't possibly throw anything away that might possibly be used on a card someday!  
The Feel Goods sentiment has been cut with framelits in the Big Shot but you have to cut the banners yourself. An easy way to get your banner tips even is to either use a square punch or snip up the centre first and then from the corners.

Wednesday, 29 May 2013

Dress Up and Score!


The All Dressed up framelits are proving very popular at the moment.  They are great for cutting card or fabric so you can put a real fabric dress on your tailors dummy! The designer paper border has a lovely scalloped edge which has been echoed with matching scorelines, although you can't see them very well in this photo. 
This card was designed by Amanda Fowler, you can see her blog here.

Monday, 27 May 2013

Secret Garden

Secret Garden is my favourite stamp set at the moment, I am using it A LOT and I love that it has matching framelits which make cutting out the images so easy!  
This card, however, was designed by one of my team Ashee for a shoebox swap that we did at my team training morning a few weeks back. You can see her blog here.
The flowers were coloured using a blender pen and ink from a melon mambo inkpad. Some flowers were adhered flat to the card front and others 3d mounted  to create dimension. The greeting is from Itty Bitty Banners.

Wednesday, 3 April 2013

All Dressed Up!


The card I am sharing today was designed by Amanda Fowler, you can see her blog here. I had the chance to make it at a team stamping day recently. 
The base card is cut using the oval scallop framelits and the big shot, part of the background layers has been embossed too, you can just about see it in this photo. The dress and stand are from the Dress it up framelit collection.  We attached the fabric to card before cutting out which makes it much neater. 

Tuesday, 26 March 2013

Karting


Here's another scrapbook page I made showing a Karting activity from Summer camp last year.  The kids faces are so expressive, revealing the fun they're having. 
My base page is Bashful blue and my photos are mounted on night of Navy card.  The row of quad bikes from the Need for Speed stamp set was an obvious addition but it took me a while to decide on the pennants for the top edge; I used a combination of pennants using the Big Shot die, Perfect Pennants and the Pennant punch.

Monday, 25 March 2013

Back to Scrapbooking


It's a long time since I made any scrapbook pages but it is such a great way of showing off your favourite photographs.  This page shows some photos of last years Scout summer Camp, I think we managed to pick the only week of sunshine last summer! 
The base page is Rich Razzleberry cardstock with a layer of Betsy's Blossoms dsp. I matted my photos onto Daffodil card and cut my letters using the Big shot from daffodil and razzleberry card.

Friday, 22 March 2013

Happy Birthday Alice!


Today my daughter turns 19, not long now before she's not a teenager anymore and ceases to know everything! 
I made this card while I was demonstrating at the Sandown craft show in January and as Alice loves butterflies, just like her grandma, I knew it would be perfect for her birthday.
The butterflies are stamped using the rock and roll technique and the mixed bunch stamp set. I punched them out with the matching punch and then removed two of the petals and 3d mounted them to make the butterfly wings. The background has been embossed with stripes.

Sunday, 18 November 2012

Razzleberry snowflakes


Phew! I'm exhausted!  I've spent all week at the theatre helping out with Spotlight's latest show, The Drowsy Chaperone.  It was great! Audience reaction was fantastic to this very funny show and we played to pretty much a full house every night.
So, I haven't had much time for making cards this week but I do have another card from last months training day to share with you.


The papers are once again from the Razzleberry Splash Simply Scrappin kit, these kits really are not just for scrapbooks!  The snowflake die has been put to great use, the tiniest snowflake is cut from glimmer paper which adds a lovely bit of sparkle.
A simple design but perfect for when you have loads of Christmas cards to make.

Thursday, 15 November 2012

Elegant Butterfly


Everyone loves a butterfly and this card has three of them made using the new elegant butterfly punch. The papers are from the Razzleberry splash scrapping kit; the razzleberry layer has been embossed using the beautiful petals a plenty folder another new addition to this years catalogue. To complete the card add accents in the form of striped grosgrain ribbon and a greeting punched with coordinating punches.

Wednesday, 14 November 2012

Petite Pocket


We made these cute little pockets at our last quarterly training day, they will be perfect for enclosing a monetary gift with your card don't you think?  They are also just the right size for one of those gift cards so I think I will be makikng a few of these decorated with Christmas papers. The Petite Pocket big shot die makes these so easy to cut out then just decorate as you choose.  This one is covered in papers from the Razzleberry Splash simply Scrappin kit and the flower is made using the floral fusion sizzlets.

Sunday, 11 November 2012

Christmas Joy


Are you feeling Christmassy yet? Are ya?  Even just a little bit? I am!  I have made a start on my Christmas shopping at last and Christmas card making is well under way. 
This card is quick and easy when you have to make a lot of cards quickly.  The new textured impressions embossing folder is perfect for Christmas and coordinates so well with the Joyous Celebrations stamp set, it has various images which fit perfectly into the centre oval space. Of course being Stampin up there is a coordinating oval punch which makes it even easier.

Friday, 26 October 2012

Snowflake


Did I show you this one? I was helping out at the Stampin Up stand at the Sandown craft show last month and this card was one that we demonstrated during the day.
It makes great use of the Bigshot as we have not only a dotty embossed background but also the beautiful snowflake die.  The greeting is from Greetings of the Season, each of the stamps in this set is a different font and all are perfect for your Christmas cards. Add a little bling with some rhinestones and 3d mount your snowflake.

Saturday, 25 August 2012

Another Christmas Gift box


Remember this?  It is a retake on the gift box that I made at team training last month but in a different colour scheme.  I used the traditional red and green of old olive and cherry cobbler together with the Holly Berry designer paper. See, I told you I would be making a lot of these!

Friday, 17 August 2012

Christmas Wreath card


I'm going to make a few of these this Christmas! Such an effective design but really easy to create. The white base was embossed in the Big Shot with the striped embossing folder and gives a great base to "hang" the wreath.  The wreath was made by punching a ring of card from two different sized circle punches and then a length of ruffled ribbon wrapped around. A tiny red faux bow finishes it off.  The greeting is from the Contempo Christmas stamp set, a couple of glimmer brads to complete.

Tuesday, 14 August 2012

Christmas Elf Boots!


How is this for a cheeky Christmas card?  A pair of stripy stockinged Elfen legs. I made this card at quarterly team training along with the gift box and I have a few more projects to share over the next few days so prepare to feel unseasonably Christmassy!
The shoes have each been made from a quarter of a top note die which was then shaped further using the ornament and circle punches, the shoes were then topped with a glimmer brad and a bow.  The gorgeous stripy stockings are from the Holly Berry designer papers and the greeting from Petite Pairs.
Related Posts Plugin for WordPress, Blogger...