Showing posts with label Happy Birthday. Show all posts

Saturday, 13 July 2013

Collage Curios


Something a little less bright and flowery today and a card that could maybe be sent to one of the men in your life.  It could certainly be brightened up just by using a different colour but here I have used the combination of Crumb Cake and Early Espresso with Very Vanilla as a base.
I used the circle punch to highlight images from Collage Curios which were them 3d mounted onto panels of designer series paper, a wood grain embossed panel and panels of contrasting colour.  A bow of seam binding ribbon and a Happy Birthday sentiment and away you go!

Monday, 8 July 2013

Mosaic Madness


Here is another from the card folder and this one is just bursting with new products! 
Again it shows off two new colours, Bermuda Bay and Coastal Cabana, I think this combination will become a new favourite of mine.  The stamp set is Mosaic Madness, it has a coordinating Modern Mosaic embossing folder and a matching mosaic Punch.  There is also a new designer series paper pack called Quatrefancy which works wonderfully well with the suite of products. 

Sunday, 9 June 2013

Need For Speed


I love this stamp set but sadly Need For Speed will be retiring at the end of the month to make room for something new to come in the next annual catalogue.
We made this card at Make, Do and Send card club a little while back and I also used the design for my swaps at the Telford training day for Stampin Up demonstrators.  The background is made using Clockworks, the car has been cut out and 3d mounted and the sentiment is from wacky wishes, a hostess only stamp set.  The Lucky Limeade colour is also retiring at the end of June but we are getting a bit of a colour revamp along with some wonderful new In-Colours.

Sunday, 26 May 2013

Serene Silhouettes


Out of ideas for a background?  How about using your clear block! I inked mine  with two coordinating inkpads and then stamped straight onto the card to give me this lovely background for my image.  The flower image is from Serene Silhouettes.

Saturday, 25 May 2013

Beth's Birthday Book


While I was in Wales a couple of weeks back visiting my daughter at uni she asked me if I could make something for her friends birthday, fortunately I rarely travel to Wales without card and stamps!  We bought an A5 notebook, I covered it with DSP and stamped the flowers from Blooming with Kindness.  The Lovely Letters were stamped, cut out and layered onto white and blue card which I had background stamped with the Confetti stamps and daubed the edge to soften it. The sentiment is from the Feel Goods stamp set.
 

Of course she then needed a birthday card too so I made this coordinating card, scoring the edges of the panels and completing with ruffled ribbon.  
I hope she liked it.

Friday, 22 March 2013

Happy Birthday Alice!


Today my daughter turns 19, not long now before she's not a teenager anymore and ceases to know everything! 
I made this card while I was demonstrating at the Sandown craft show in January and as Alice loves butterflies, just like her grandma, I knew it would be perfect for her birthday.
The butterflies are stamped using the rock and roll technique and the mixed bunch stamp set. I punched them out with the matching punch and then removed two of the petals and 3d mounted them to make the butterfly wings. The background has been embossed with stripes.

Saturday, 10 November 2012

Anchor's Away!


This card is CAS'ed from my convention roomie Elaine Harding, you can see her blog here, I received it in a swap at a team training event earlier this year, it uses a technique called faux tearing which makes use of some copier paper and a sponge dauber. The stamp set is Open Sea and is stamped in Soft Suede ink; the anchor image is punched using the tag punch and attached to the card with linen thread.

Friday, 31 August 2012

Happy Birthday


Another birthday card to share today.  This one was for my Mother in Law who was 82 a few days ago.
The stamped image is from Apothecary Art, cut out using the matching framelit dies, the greeting was coloured using a marker pen.
The Everyday Enchantment designer paper is now retired but i thought it was one that she would like.  

Speaking of retirement, it won't be long before we get the new Stampin up catalogue (on 1st October) which means that tomorrow we will hear what is to be discontinued from the current catalogue.  There are sure to be some favourites retiring but how exciting to be getting some new products!  

Also tomorrow is the launch of the new Autumn and Winter catalogue which will run until the end of January.  There are some gorgeous products in there which I hope you will love as much as I do, my wish list is so long! 
If you would like a copy of the new catalogue then please shout and if you would like to host a workshop or to attend a class or club then you can email me.

Wednesday, 29 August 2012

Little monster


Goodness, where is this year going?! Almost the end of August already, the kids will be back to school next week and then it's all downhill to Christmas :/

I made today's card a few days ago, it's for the son of one of my best friends and sadly because we were on holiday he is going to receive his present late this year :(
The stamp set is Build a Monster, it's a great set as all the monster parts are separate stamps so you can create loads of different monsters!  I coloured them using a blender pen and the ink from the lid of my inkpads.

Wednesday, 25 July 2012

Happy Birthday!


Well, the lady in question should have received this by now so it's ok to share with you. I made this card for the birthday of one of my downline, Happy Birthday Val :)
The image is from a new stamp set that is available FREE in August with a qualifying spend and is called Reason to Smile. So if a free gift isn't reason enough to smile then a birthday certainly is.

Saturday, 7 July 2012

Apothecary Art and Framelits


I designed this card for last months Make, Do and Send card club. It's the first time I have really made use of the new framelit and edgelit dies that became available in the Summer mini catalogue. The framelit dies come in various sizes and coordinate perfectly with the Apothecary Art stamp set. The edgelit dies, which I have used here on the vertical edge of my card front and also echoed with the Twitterpated designer paper on both the front and inside of my card, create a beautiful decorative edge; there are also complementing embossing folders available. 
For this card I kept to just one colour, Island Indigo. The image is coloured with Indigo ink using a blender pen. 

Wednesday, 4 July 2012

Up, Up and Away


Happy 4th of July to all my friends across the pond! 


This is card number three from the portfolio set and showcases the new Up, up and away stamp set from the summer mini, aren't the hot air balloons cute? The base card is chocolate chip which remains one of my favourites. The images are also stamped in chocolate chip onto sweet shop designer paper. The sentiment is stamped in chocolate chip onto whisper white card, matted onto pool party card and attached to chocolate satin ribbon.  You can just see in the photograph that the bird images are continued onto the card insert.

Friday, 29 June 2012

Forked bow!


This bow is made using a fork! I won't try to explain how but I am sure there are lot's of tutorials to be found on the internet, I guess you could use a bow maker too. 
The ribbon nicely covers the edge of the designer paper and the bow sits on top.  The flower is made from two Mixed bunch blooms, the top layer has had the individual petals cut to the centre which adds some 3D interest and a touch of bling in the centre from a rhinestone.  The greeting is from the curly cute stamp set.

Thursday, 28 June 2012

Rock and roll, Vintage Vogue and a Faux Bow!


Another pretty bow taught to me by Amanda. However this one isn't really a bow it just looks like one and the beauty of this one is that it lies so flat that it will easily go through the post, alternatively you could add lots of extra layers and colours to it and really go to town. 
The stamped image is using the Vintage Vogue flowers and I used the rock and roll technique to get the two colours.  First I inked up my stamp with the paler pretty in pink colour and then carefully rolled the edges of the stamp on the rose red ink pad so that colour was only added to the edge.  

Wednesday, 27 June 2012

Simply Happy Birthday


Simple designs are often the most striking I think.  This stamp is available exclusively to hostesses and is part of a larger set of 11 stamps called Happiest Birthday Wishes.
The base card is Peach parfait and I coloured the stamp with marker pens in various colours that would coordinate with the peach.  I didn't have any peach ribbon so I added another strip of card along the bottom of the card and echoed that on the insert.  Then I thought I was done so I took my photograph but looking at it later I decided that it was missing a little something. 3 Rhinestones on my peach strip was what it needed :)


Wednesday, 13 June 2012

Inked & Embossed


Another new technique! Well not quite, I have attempted this one once before.  This effect is achieved by taking an inkpad to the inside of an embossing folder before placing the card inside and running through the Big Shot. There are a lot of layers to this card, the pretty in pink base card and then Rose Red designer paper followed by a crumb cake layer and then the embossed layer, the embossing folder is elegant Bouquet. The butterfly was punched from dsp and attached with a rhinestone brad.

Sunday, 27 May 2012

Watercolour Tortoise


An evening out has been an extremely rare occurrence this year so when I had a last minute opportunity to attend a team training evening I grabbed it with both hands.  My upline is the lovely Amanda Fowler, you can see her blog here and this was one of the projects she had for us that night. 
We were trying different colouring techniques and for the tortoise image we used the watercolour crayons and an aqua painter.  The designer paper is from the neutrals stack and the button accent is "stitched" on with a narrow strip of card stock.

Wednesday, 23 May 2012

A Bit Shirty


Perfect for the men in our lives!  This shirt is made from just half a piece of A4 card stock, the pocket being made from the piece of card that was removed from the back. I added brads to imitate buttons and the tie is a piece of designer paper.  I used the white gel pen to add the stitching detail.  I used this card recently for a couple of birthdays but it could be a good one for Fathers day too!

Tuesday, 22 May 2012

Birthday cake?


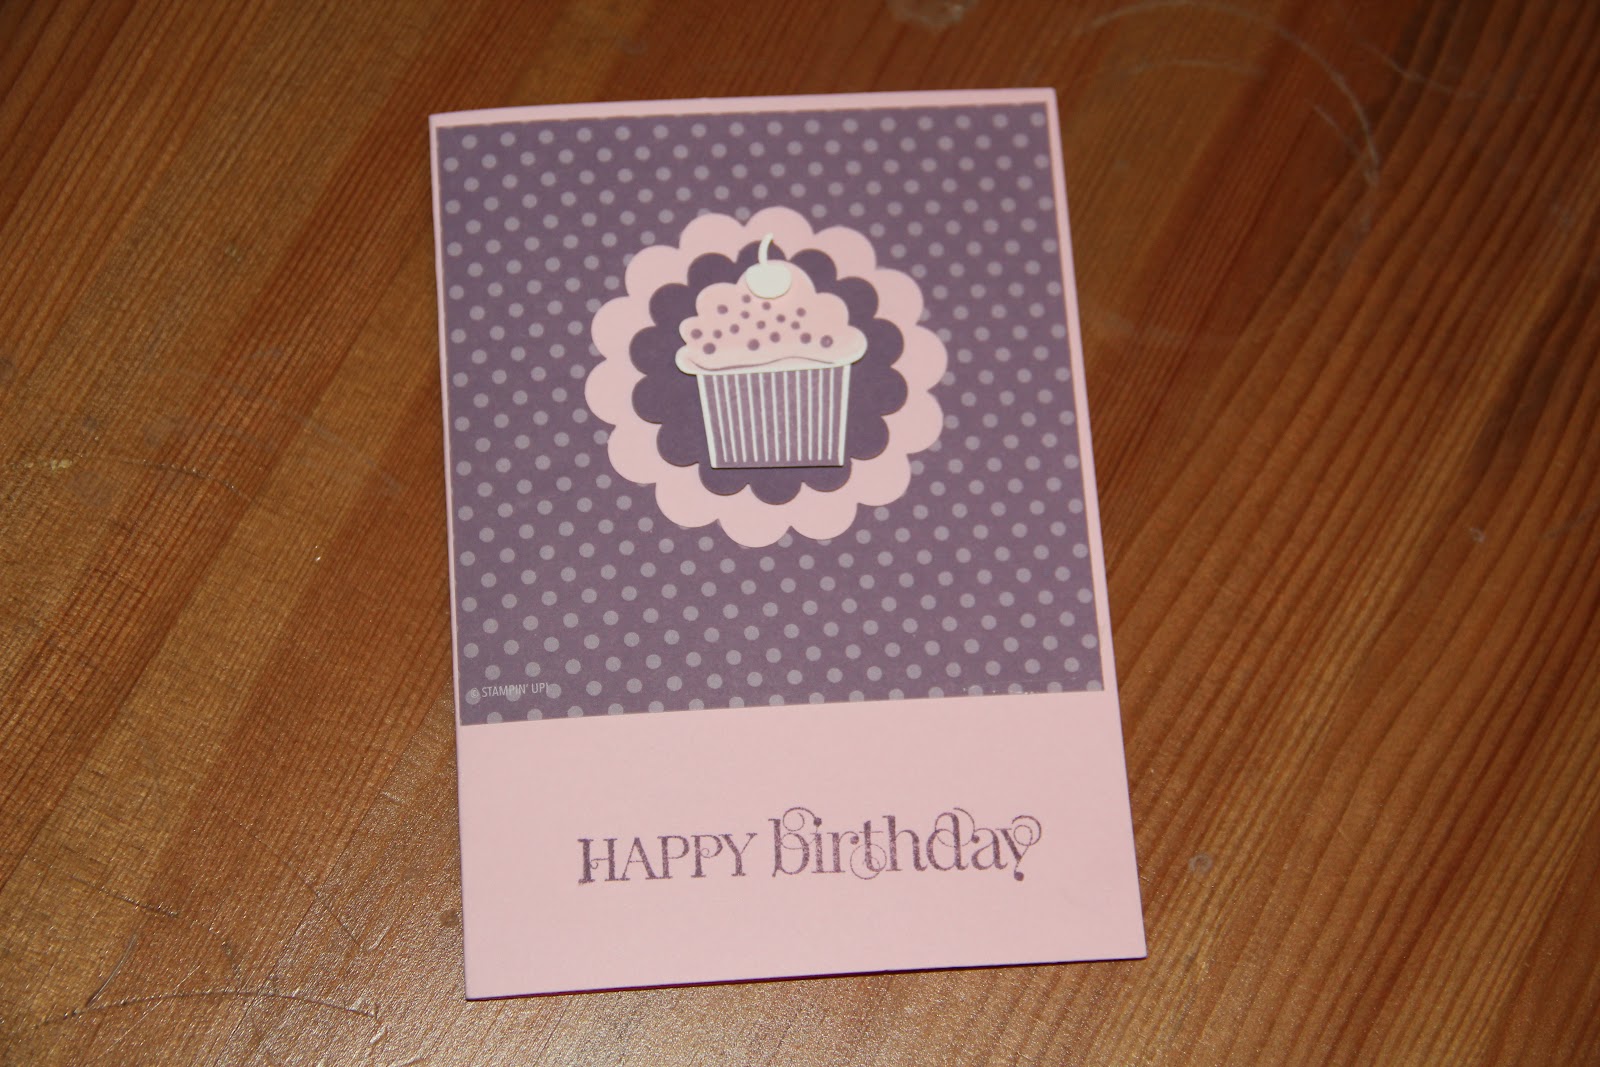
More new products from the Spring mini that I really hope are going to carry over into the new main catalogue in October. Can you spy new punches?  There are two!  We have the create a cupcake punch that coordinates perfectly with the stamp set (which also make great clouds and sheep and tons of other stuff!) and the new large scallop circle punch. Colours today are Perfect plum and Pretty in Pink and the sentiment is from Curly cute

Thursday, 10 November 2011

Munch Punch!


Who says you should stick a paper butterfly to a card?!  This is my goddaughter's birthday cake, her mum used the butterfly punch with coloured rice paper for the finishing touches.  I think it looks gorgeous and I bet it was tasty too :)
Related Posts Plugin for WordPress, Blogger...