Showing posts with label Designer Paper Pattern stack. Show all posts

Wednesday, 17 July 2013

Embossed Vellum


This has to be one of my favouritest ever cards, we made it recently at Make, Do and Send Card club.  It's not my own design, I confess I CAS'ed it completely. 
Take a sheet of vellum cardstock and run it, together with an embossing folder, through the Big Shot. Attach the vellum along one edge to your base card, you can cover the glue with ribbon.  Then we added some butterflies made from Designer series paper using the Beautiful Wings embosslits and finished off with a touch of bling by adding a rhinestone.

Saturday, 13 July 2013

Collage Curios


Something a little less bright and flowery today and a card that could maybe be sent to one of the men in your life.  It could certainly be brightened up just by using a different colour but here I have used the combination of Crumb Cake and Early Espresso with Very Vanilla as a base.
I used the circle punch to highlight images from Collage Curios which were them 3d mounted onto panels of designer series paper, a wood grain embossed panel and panels of contrasting colour.  A bow of seam binding ribbon and a Happy Birthday sentiment and away you go!

Thursday, 4 April 2013

Asymetric Gift card


Today's card is from a shoebox swap that was held at our recent team day.  I can't remember who provided this one, sorry, but it I find out then I will point you in her direction. 
It's a great way to present a gift card as the clever fold creates a pocket on the front and also on the inside of the card.  Of course, it can be made for absolutely any occasion and decorated as you please but in this case we used designer paper in coordinating colours, the border punch and the ribbon flowers.


Friday, 9 November 2012

Snowy Friends


I have another Christmas card to share today.  The snowmen were stamped and coloured with marker pens and mounted onto early espresso card.  The edge of the card has a scallop edge echoed on the base card.  A pretty bow completes the look.

Wednesday, 24 October 2012

Winter Memories

Once again I am in a Welsh hotel and I am getting excited as it is almost time for the Stampin Up convention in Mainz, Germany and I am busy making card fronts to swap with my fellow demonstrators.

I do have a card for you, Christmas again! :)


This stamp set, Winter Memories was one of the first to catch my eye from the Autumn and Winter seasonal catalogue.  I think the designs lend themselves perfectly to muted tones and watercolours and this is exactly what I have done with this lovely image of ice skates. Rather than watercolour I used a blender pen picking up the ink from the lid of my inkpads.  I stamped and coloured the image twice so that I could cut part of it out and 3d mount it.  Here's a closer look.


The dotty background paper is from the neutrals designer paper pattern stack and I added some dazzling details glitter for sparkle and some real red ribbon.

Saturday, 30 June 2012

Christmas Bauble


I know it's only June but you can never begin Christmas preparations too early!
For this tree bauble I used the ornament punch to cut lots of shapes from real red designer paper, old olive card and red glimmer paper. I folded them all in half and stuck them all together to create a three dimensional bauble.  I attached a loop of ribbon in the centre so I can hang it on my tree.


OK that's one down, loads more to go, phew it's a good job Christmas is still 6 months away!

Wednesday, 20 June 2012

Scoring for decoration


Your Simply scoring board is not just for creating boxes and envelopes, here I have used it just to add some decoration to my card. You can't see it very well in the photograph I will have to try and get a close up but I have scored 3 parallel lines both above and below the flowers. The flowers are from the Boho blossoms punch and have rhinestones in the centre. Rich Razzleberry has always been a favourite of mine and I love this combination of razzleberry, Melon Mambo and chocolate chip. 

Tuesday, 19 June 2012

Waterfall card


The beauty of the Simply Scoring Board is that you can make an envelope to match your card in any paper you like and to whichever size you require.  Amanda showed us how with this design.  The card is a waterfall design with the edge randomised by the stamping and some ribbon to hold it closed for sending. 


The envelope is made to measure in colour coordinating designer paper.

Wednesday, 13 June 2012

Inked & Embossed


Another new technique! Well not quite, I have attempted this one once before.  This effect is achieved by taking an inkpad to the inside of an embossing folder before placing the card inside and running through the Big Shot. There are a lot of layers to this card, the pretty in pink base card and then Rose Red designer paper followed by a crumb cake layer and then the embossed layer, the embossing folder is elegant Bouquet. The butterfly was punched from dsp and attached with a rhinestone brad.

Saturday, 9 June 2012

Open Seas


I have a feeling that this is a stamp set that you might see quite a lot of. I have already used it several times and keep coming back to it.  The Open Sea has quite a vintage feel I think and so for this card I made use of that and distressed my papers a little.  The colour combination of Crumb Cake and Marina Mist is one I use a lot too but it works so well!

Friday, 8 June 2012

Rosettes Simply Scored


Woohoo! We now have the Simply Scored Tool to use and it's just brilliant! There are just loads of different ways to use the board and you can add a diagonal scoring plate or a metric plate if you find that easier to use.
This is my first attempt at a rosette, they are so much easier to make than you think.  This one was made from designer paper and scored every quarter inch. Then the strip of paper was concertina'd and the ends joined together to complete the ring.  A circle punched from coordinating paper finishes off the centre.

Tuesday, 5 June 2012

Need for Speed


Another stamp set that has been on my wish list since the catalogue was launched last October. It's perfect for the lads in our lives, there's a car, bike, boat or plane for everyone.  I've used the glimmer brads to attach my car to the card and matched them to the colour of my car. The designer paper stack in neutrals is perfect for this monochrome look and I used tiny strips of dsp to make the brackets opposite the brads. 
This design would be great for Father's day I think but maybe not for me this year as I made 40 of these as my swaps for the Reading training!

Sunday, 27 May 2012

Watercolour Tortoise


An evening out has been an extremely rare occurrence this year so when I had a last minute opportunity to attend a team training evening I grabbed it with both hands.  My upline is the lovely Amanda Fowler, you can see her blog here and this was one of the projects she had for us that night. 
We were trying different colouring techniques and for the tortoise image we used the watercolour crayons and an aqua painter.  The designer paper is from the neutrals stack and the button accent is "stitched" on with a narrow strip of card stock.

Tuesday, 22 May 2012

Birthday cake?


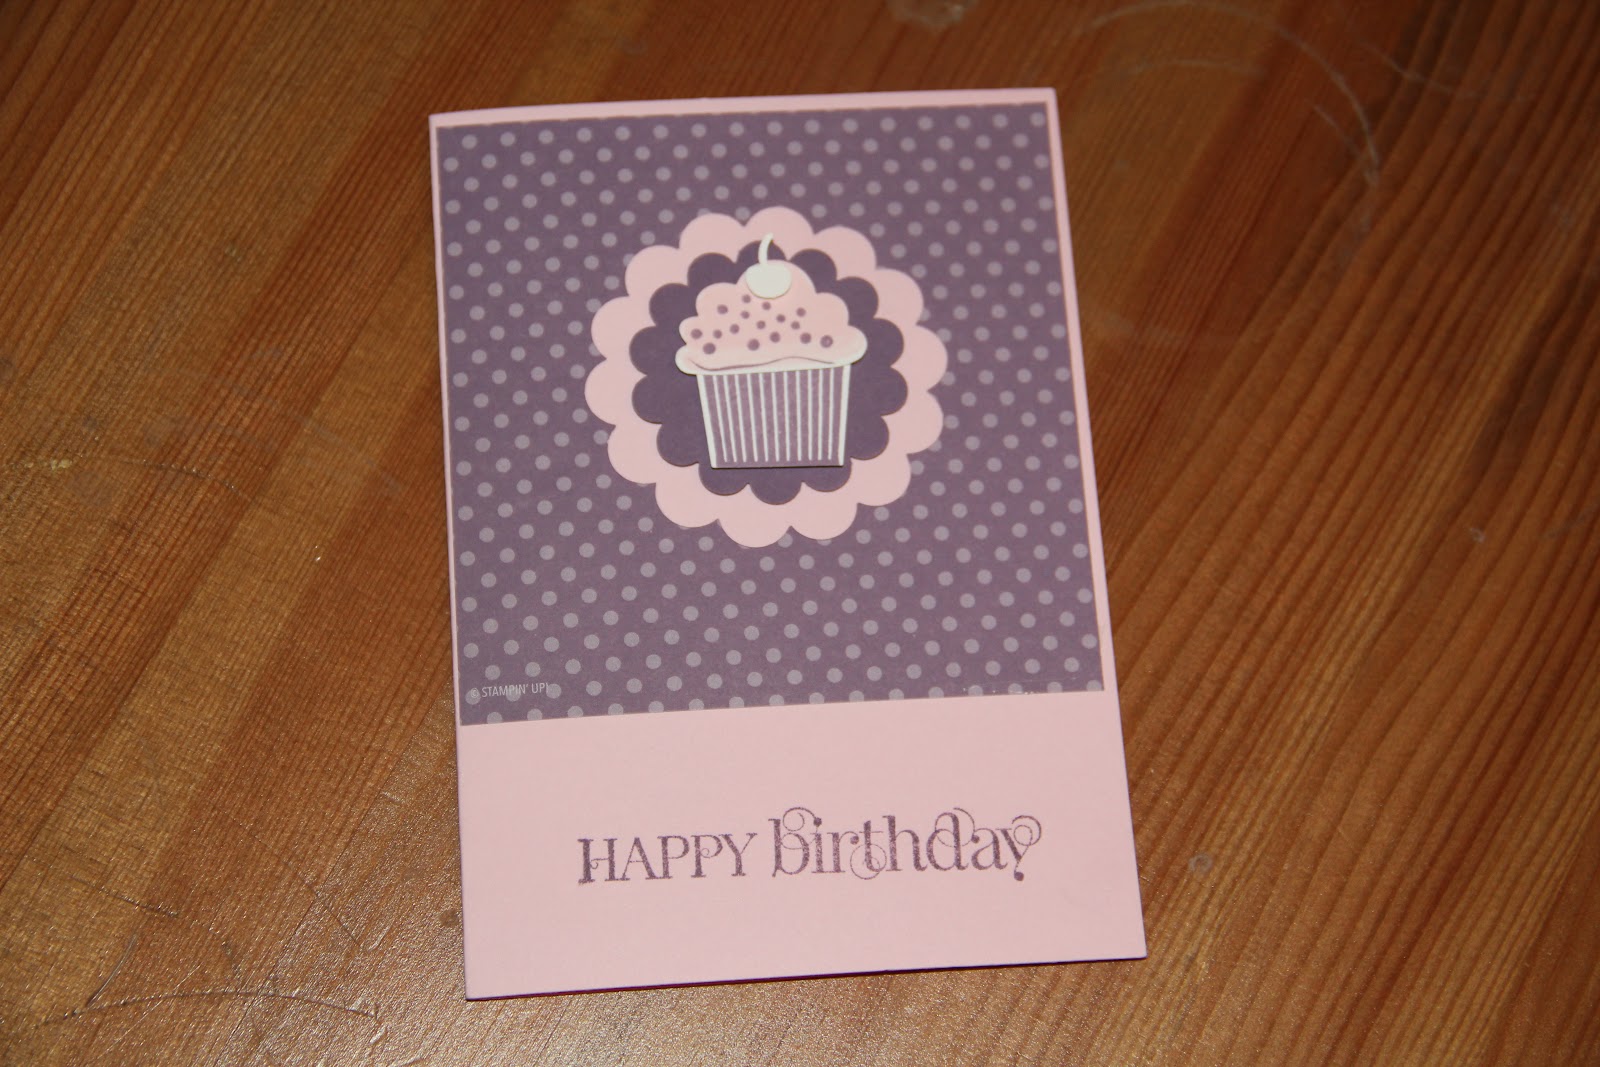
More new products from the Spring mini that I really hope are going to carry over into the new main catalogue in October. Can you spy new punches?  There are two!  We have the create a cupcake punch that coordinates perfectly with the stamp set (which also make great clouds and sheep and tons of other stuff!) and the new large scallop circle punch. Colours today are Perfect plum and Pretty in Pink and the sentiment is from Curly cute

Monday, 10 October 2011

Birthday Balloons


A quick visit today.  Todays card is similar to an offering from the other day, same design but different image and paper.  They are of course from the same stamp set, Party this way, and the same Celebrate designer papers.  The balloons create a different look from the candles but the design still works well.

Friday, 7 October 2011

How Many Candles?


Today's card is from last months  Make, Do and Send Card club. The "Celebrate" papers are now sadly retired but the stamp set, Party this way, lives on; I'm very glad about that 'cos I love it.
I took the cue for colours from the designer paper and stamped the candles in red, pear pizazz and bashful blue.  The sentiment was punched from card in those colours too.

Thursday, 6 October 2011

Love Hearts


Morning all, what happened to our heatwave then huh?!  It's very definitely Brrrrr round here today. 
This is the last card I have to share from my All Occasions class, can you guess which occasion it might be?!   I would probably use it for Valentines Day but it could be used for an anniversary too I think.
Rose red card stock, designer paper and ink with stamps from the I [heart] Hearts set.  This stamp set is still part of Stampin Up's excellent value starter kit and if you join me during October then there are extra freebies for you too!
I need to get back to making my swaps for the forthcoming team training day on the 15th now.  More tomorrow :)

Wednesday, 5 October 2011

Happy Balloon day!


An offering from the 2010-11 in-colours today. You gotta love concord crush and it goes so well with pear pizazz.  The in-colour designer paper pattern stack was one of the hostess gifts last year and I used it here to make the balloons.  I used a technique called paper piecing; I stamped the image on the card and then again on the designer paper.  I cut the image out from the paper and "pieced" it onto the card.  The sentiment is from sincere salutations and punched using the decorative label punch.  I daubed around the edge in concord ink to soften the edges

Wednesday, 21 September 2011

Preview!

I thought I would give you just one little preview of what you can expect if you are coming to my All Occasions class next weekend.  This is just one of the many cards we will make, I hope it whets your appetite. The background is from the designer paper stack in Baja Breeze.  The Wedding wheels image is stamped in matching ink, as is the sentiment. I used the scallop border punch to create the pretty edging for the image and finished off with a large bow of whisper white organza ribbon.

Tuesday, 20 September 2011

All Bigshot, no ink!


I've been so busy the last few days that I have neglected my blog :(  Last week I was busy making card fronts ready for swapping at Stampin' Up's regional training day.  I had a great time and came away very inspired and raring to go and I also received some very wonderful swaps that will inspire my own cards and classes for some time to come.  Since the weekend I have been busy preparing for the All Occasions card class that I am running on Saturday and also for Make, Do and Send card club which is the following Thursday.  There are bits of card and ribbon all over the place at the moment, I love it! :) 
The card above is the last one from August's Make, Do and Send club and is also what I used for my swaps last weekend.  I had a bit of a panic when I ran out of poppy card but a fellow Stampin up demo came through for me and gave me some last Wednesday at team training.  Which reminds me that I have some cards to share from that night too!  The card is made entirely using the Bigshot dies, there is no ink whatsoever!  The baja breeze base card and poppy red topnote for the background with the fun flower die using designer stack papers in poppy for the accent.  I added a dash of whisper white organza ribbon and a pearl or two and voila!
The last chance list is still running on the Stampin Up! website. Christmas Jingle simply scrapping kit has joined the items that are now gone forever as has Night of Navy satin ribbon. It's sad to see these things go but I am so excited to be able to share the new catalogue with you shortly, there are lots of lovely new things, I can't wait!
Related Posts Plugin for WordPress, Blogger...