Sunday, 23 January 2011


These pictures were taken on our favourite Cornish beach during a February half term break, hence the empty beach, it certainly doesn't look that empty in the summer!  I love the way the sky is reflected on the wet beach.
The background page is a So Saffron coloured page from the designer stack once more; I used the so swirly wheel to ink the swirly design and the All in the Family stamp set to add the little people, so cute.
   

Saturday, 22 January 2011

Something old, new, borrowed and ...

.... blue!
I think this is my favourite photo from Rachel and Alex's blessing so it definitely deserved to be scrapped for posterity don't you agree? The backing page is made from 2 pieces from the designer stack in Marina Mist blue, the photos are matted onto the same colour and I sponged the edges of the photo mats in marina mist ink.  The two smaller photos are of details of the day that were so pretty I just had to snap them too and they make a lovely accompaniment to the main picture along with titling made from a scalloped punch.  The ribbon, in which I "tied a knot" !!!, is whisper white of course, just right for wedding pictures.

Friday, 21 January 2011

Monotone

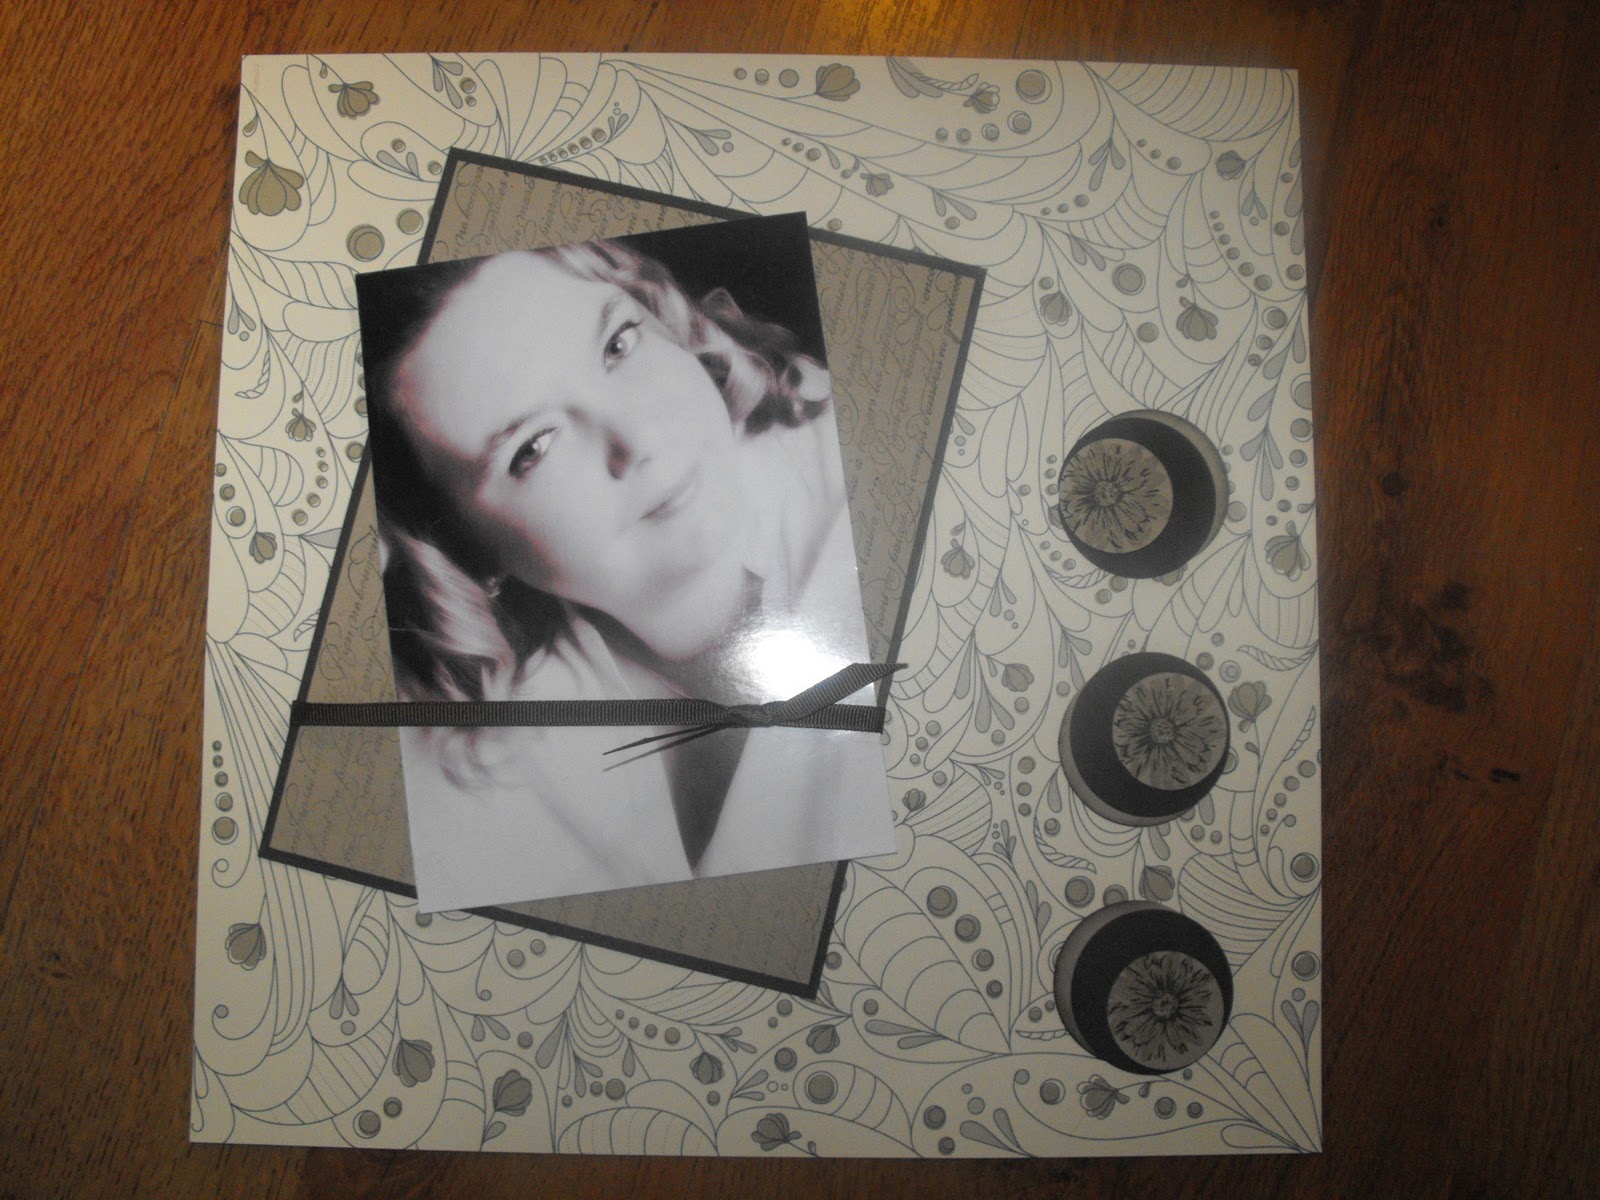
 Revisiting a photo I've scrapped before but treating it in a different way. The 12x12 page is from Stampin Up's Elegant Soiree designer papers in crumb cake. I laid my photo onto a piece of crumb cake card that I had stamped with Le Francais stamp in Early espresso ink, I matted it onto espresso card and added  a piece of espresso ribbon.  I like the jaunty angle so I continued that theme with my stamped flower accents.  I used the twostep stamps from the Green garden stamp set, stamping in crumb cake and espresso ink and 3d mounted them with dimensionals.  I made another page today using photo's from a family wedding in the autumn, I'll show you that tomorrow.

Thursday, 20 January 2011

Scrappin'

It's been a long time since I made a page for my scrapbook but as I have been asked to contribute some pages as display samples for the stand at the Brighton Hobbycraft show I thought I'd better get cracking, I only have a couple of weeks left!
The photos are of the fireworks in London at New Year, all double matted onto whisper white and rich razzleberry cardstock. The background paper is also razzleberry and comes from the designer paper stack; I added some accent using ribbon along one edge and making a loopy bow.  More tomorrow I hope.

Wednesday, 19 January 2011

Autumn Oak


Another poor photograph, sorry.  I made the Oak Tree from the Lovely as a Tree set very autumnal looking using an aqua painter and the ink from my inkpads, Being very frugal I used up a scrap of background paper tearing down the diagonal and sticking to a wild wasabi card blank.  I didn't mat the image today just added it directly to the card but I did add a splash more colour by using a yellow scallop punched greeting and a ribbon along the spine.


Tuesday, 18 January 2011

Cup Cake


How cute are these two greedy mice mates?!!   I stamped the image in Staz on ink so I could use my favourite watercolours again! Just a simple dotty background paper from Stampin up's paper stack and a touch of ribbon to complete.


Monday, 17 January 2011

Lovely as a fir tree.


The quality of this photo isn't very good I'm afraid, I will replace if I ever find a spare five minutes. I went back to those images I stamped and watercoloured a couple of weeks ago for this card.  The fir tree this time, matted onto crumb cake and wild wasabi card and mounted onto a crumb cake base card.  I also used one of the tiny stamps from the Lovely as a Tree set to stamp a background for the card.  I added a scallop punched greeting in wasabi to finish it off.
 

Sunday, 16 January 2011

A tiny touch of Spring


I don't know about you but I am getting very fed up with this weather, I want Spring to arrive and I want it now!  I went digging through my stamps to find something a little more Springlike and rediscovered this one that I hadn't used for sometime.  It's a retired Stampin Up set (I hate it when they retire my favourites :(  ) It's so pretty, the girl is wistfully looking across the field enjoying the sunshine don't you think?  Another watercoloured image cos this one definitely needs a soft focus then matted onto Marina Mist designer paper and card.  A touch of ribbon and a scallopped oval punch and greeting.
 

Saturday, 15 January 2011

Balloon Bear


 You can't have a birthday without balloons can you! and this little cutie has lots.  I was feeling a little more creative with this one, I used papers from the Stampin Up designer stack again, Wild Wasabi this time.  The papers are double sided so I ripped it in half along the diagonal and used both sides.  The ribbon is Very Vanilla grosgrain and instead of tying a bow (or more probably a knot!) I twisted the ribbon once before adhering inside the card.  I'm not quite sure if I like the effect yet, time will tell.  The stamped image has been watercoloured and matted onto Wild Wasabi card.

Friday, 14 January 2011

Mouse Mail


 What a miserable day outside today!  Rain, rain and then for good measure some more rain! So, a very good excuse for playing with some crafting goodies.  This card makes use of a very cute mouse image; it was stamped in Staz-on ink and watercoloured with my Stampin Up crayons.  The backing paper is from Stampin Up too, a spotty Marina Mist colour from the designer stack papers.  It is all mounted onto So Saffron card, a touch of whisper white satin ribbon and a greeting from the All Oval stamp set punched with the oval scallop.  I've been quite busy today but I'll share more results tomorrow.

Tuesday, 11 January 2011

Music Maestro


Something a little different today.  I received this stamped image of a violin in an image swap from Craft Swap Forum.  I coloured it carefully and matted it onto gold paper; the card was lined in the same gold paper.  On the front of the card I used the music stave paper from Stampin Up's designer paper range ( I LOVE this paper set!  I will use it a lot!)

Monday, 10 January 2011

Golden Butterfly


Back to some more spring, sunshiny colours today, Wild Wasabi for the base card then a strip of designer paper in matching wasabi colour.  The butterflies are from the Bliss sale-a-abration set, stamped in Daffodil delight ink onto vanilla cardstock and matted onto a larger strip of Daffodil Delight card.  The "Thanks" greeting is another sale-a-bration set  (don't forget to give me a shout if you want to know how you can get these stamps for free!) again stamped in daffodil delight onto vanilla card and punched with the oval scallop.
I need to make some swaps for team training at the end of the month, I think this might be it.

Sunday, 9 January 2011

Bliss


Morning!  New toys to play with today,  among the items in my parcel from Stampin Up the other day was a crimper!  Now I have to confess that the first time I came across this at one of Amanda's workshops I wasn't that keen but she has shown me lots of ways to use it and I have gradually fallen in love with it. So, onto the details...Marina Mist is the base card today over which I stamped a flower, from the Sale-a-bration Bliss stamp set, in Marina Mist ink.  The flourish image is also from the Bliss set which I stamped in Crumb cake ink onto Vanilla card and matted onto Crumb Cake card. I used a sponge dauber to add some ink to the edges which softens the while thing a little. I ran a strip of crumb cake card through the crimper and added it as an accent along the bottome of the card; it acts as a ribbon for my greeting which again is  from the Bliss set and stamped in crumb cake ink.

Saturday, 8 January 2011

Springtime trees


Remember those images I stamped and watercoloured the other day from the "Lovely as a Tree" set?  I finally managed to get one onto a card today.  The weather is so wet and grey outside that I felt the need for something a little more springlike so the colour combination of Certainly Celery, Daffodil Delight and Wild Wasabi did the trick perfectly.  I background stamped the base card with celery ink using a flower stamp from one of the Sale-a-bration sets, the birthday greeting comes from there too but due to the poor photograph it doesn't show very well.


Friday, 7 January 2011

More Razzleberry!


Don't look now but this is my fifth entry this week!!  I had a delivery from Stampin Up this morning and even though I was as excited to open it as always I also had to check it very carefully as the box had been so badly damaged in transit and was very water damaged.  The delivery man was most apologetic and made sure I had all the information I need in case the contents were damaged.  Thankfully only one pack of card was  spoiled and will have to be sent back for replacement.
Todays card has Rich Razzleberry as it's base once again, I so love this colour. The stamped image is from one of the hostess sets, Punch Potpourri, stamped in black staz-on ink and then watercoloured with razzleberry ink.  The greeting is from one of the Sale-a-bration sets "So Happy For You", I used the scalloped oval punch and 3d mounted it.. The final accent is a ribbon bow in Whisper White.
A change of colour scheme tomorrow I think!

Thursday, 6 January 2011

Freebies!


 These cards I made using some free papers that were given away with a magazine, I forget which one, but theyre very pretty.  The stamped images were coloured with promarkers.  The last one has some 3D'd roses, I took a second piece of matching paper and cut out the flowers and 3d mounted them to add the dimension.

Wednesday, 5 January 2011

I "heart" Hearts

 Morning, isn't it lovely to see the sunshine!  I've been playing with one of the stamp sets that came in my Stampin Up starter kit today. Rich Razzleberry cardstock for the base card stamped with Rich Razzleberry ink for the background.  Then I stamped various combinations of hearts onto vanilla card, again in razzleberry ink, and cut them out. Some of the hearts were laid flat and others 3d mounted to add some dimension. I also added some tiny pearls to accent the matted card.

Tuesday, 4 January 2011

Christmas in January


 Here, at last, are a couple of the Christmas cards I made this year.  I had stamped a variety of images a while ago but only got around to colouring them with my new markers in time for Christmas.  I simply matted the images onto either gold or silver paper and mounted them onto pearlised card stock. Oh! and added a touch of glitter, well you've got to have a little sparkle haven't you 
 

Monday, 3 January 2011

Happy New Year!

Happy New Year!
3rd January and I've made it to Blogland :)  That's my resolution this year, to make it here much more often than I have managed in recent months.
I'm back to school tomorrow but the holidays have given me a few opportunities to catch up with myself.  So much so in fact that I found time to have a play with some stamps and watercolours today.  The stamps are from the "Lovely as a Tree" set from Stampin Up.  I stamped the images with a staz on ink pad and then coloured them using watercolour crayons and a waterbrush.  I played about a bit with trying to make the different seasons.  Here's the results:


Sunday, 12 December 2010

Christmas Panic

I'm beginning to get in to Christmas panic mode!  As ever, I'm behind with my preparations and although I have been busy stamping images and colouring them with my new promarkers (they ARE lovely), I only got around to making them into Christmas cards yesterday.  This photo shows just a few of the ones I finished but there were about 40 altogether.  This coming week is the last week of term and it's very busy at school, I think we have a concert every day but if I get chance I will upload some more pictures so you can see the images more clearly.


Friday, 19 November 2010

AWOL

April?! APRIL!!! Where have I been?
An awful lot has been going on in my life over the last few months and the blog has taken a back seat sadly, hopefully that will begin to change now.

I have BIG news! about 3 weeks ago now I signed up with Amanda to become an Independant Stampin Up demonstrator!! Exciting times :O) I spend a lot of money with Stampin Up cos I just lurve their products so it made sense to sign up and share that love and excitement with lots of other people. I'm still going to Amanda's workshops so I have lots of cards to show off. I'll get uploading now shall I ?

Friday, 16 April 2010

Remember this one ?

this is a card I made a little while back, the paper I used was part of a free gift from Cardmaking and Papercraft magazine. I sent in this photo to the magazine to show what I had made with the gift and they published it in the Readers Gallery this month!!!! You could have knocked me down with a feather when I opened the letter informing me I had won a prize of a stamp set for my efforts.
Well chuffed :O)

Thursday, 15 April 2010

Workshop makes


I had a great day out at the Hobbycraft show at the NEC at the end of last month and I managed to book myself in to a couple of workshops while I was there. The first one I did was with Stephanie Weightman of Create and Craft TV fame where we made this pink rose stepper card. I love the image and it really is a quick and easy make, just assembling the pieces in the right order. The other workshop was with Lisa B where we made this beautiful tag using masking techniques and distress inks. The stamped image is embossed and painted and then some glitter for added bling. I'm going to mount the tag onto a card I think and add some ribbon.

Sunday, 4 April 2010

Happy Birthday!

Another birthday card, this one destined for the postbox for a friend of mine. Again I watercoloured a stamoped image and layered it onto Bazzil cardstock, with a little more imagination this time I think, adding diamonds and squares into the mix. A touch of glitter and a ribbon to finish off.

Saturday, 3 April 2010

Cheeky Girl

Oops! been nearly a month since I last blogged :S well on this blog anyway; I have been blogging on www.4thhestonlejog.blogspot.com
Anyhow, here is a cheeky little lady! I watercoloured the stamped image and layered her onto orange and yellow bazzil cardstock and attached the tag to the card with a brad. Backed onto a pretty plaid paper and a stamped message added to the bottom. Oh and a dash of glitter to add some bling :O)
Related Posts Plugin for WordPress, Blogger...