Showing posts with label rose red. Show all posts

Thursday, 28 June 2012

Rock and roll, Vintage Vogue and a Faux Bow!


Another pretty bow taught to me by Amanda. However this one isn't really a bow it just looks like one and the beauty of this one is that it lies so flat that it will easily go through the post, alternatively you could add lots of extra layers and colours to it and really go to town. 
The stamped image is using the Vintage Vogue flowers and I used the rock and roll technique to get the two colours.  First I inked up my stamp with the paler pretty in pink colour and then carefully rolled the edges of the stamp on the rose red ink pad so that colour was only added to the edge.  

Thursday, 14 June 2012

Spotlight technique


I really like his one, I'm sure I will use this technique a lot. Amanda showed us at her class a few weeks back and it's really very simple.  The stamp set is Simply Soft and is exclusive to hostesses, the greeting is from Petite Pairs. to begin with the design is stamped in one colour on a base card then on another piece of card stamp again.  This extra piece needs to be punched or cut, coloured (for this sample we used markers and a blender pen) and then mounted onto a piece of card colour coordinating with the main card base, in this case we used rose red. You could mount it flat or 3d mount it to add some dimension.

Wednesday, 13 June 2012

Inked & Embossed


Another new technique! Well not quite, I have attempted this one once before.  This effect is achieved by taking an inkpad to the inside of an embossing folder before placing the card inside and running through the Big Shot. There are a lot of layers to this card, the pretty in pink base card and then Rose Red designer paper followed by a crumb cake layer and then the embossed layer, the embossing folder is elegant Bouquet. The butterfly was punched from dsp and attached with a rhinestone brad.

Saturday, 2 June 2012

Flight of the Butterfly


This stamp set has been on my wish list forever and it's another set that has a coordinating punch to go with it. 
My daughter turned 18 in March but for various reasons we couldn't hold her party until mid April and Oh what a great night it was. Lots of family and friends joined us to celebrate and we all danced the night away to the wonderful A-band-on-ship who did indeed abandon their ship for the evening to entertain us.
However, I digress!  Back to the card.  Of course Alice had many thank-yous to send and this, along with yesterdays card, was one of the designs that I made.  This version uses a designer paper that retired from the Stampin' Up! catalogue last year but you could use any coordinating paper to create a similar version.  My colours were Rose red and Marina Mist which are echoed in the dsp and the butterfly is punched and 3d mounted for definition.

Tuesday, 11 October 2011

Ribbon Flower Bookmark.


I first made one of these with my upline, the lovely Amanda Fowler but I loved it so much that I decided to share it with the wonderful ladies at Make. Do and Send card club.
I took 2 pieces of coordinating card, rich razzleberry and rose red and a piece of flowery designer paper and popped them through the big shot with the fun flowers die so that I ended up with 3 sets of flowers.  I played about with the combinations for a little while until I had settled on which order I wanted them.  I then assembled a shallow flower for the back of my bookmark, using a coordinating brad for the centre of my flower and adhering the ribbon on the back of the largest flower with lots of sticky strip.  I stuck the other largest flower to the front of my ribbon and built up the remaining layers to create a huge flower.  I curled some of the edges to ass interest and depth and again added a brad to the centre.  The ribbon is long enough to save your page in any book and trimmed into shape at the end.

Sunday, 9 October 2011

Baby Blossoms


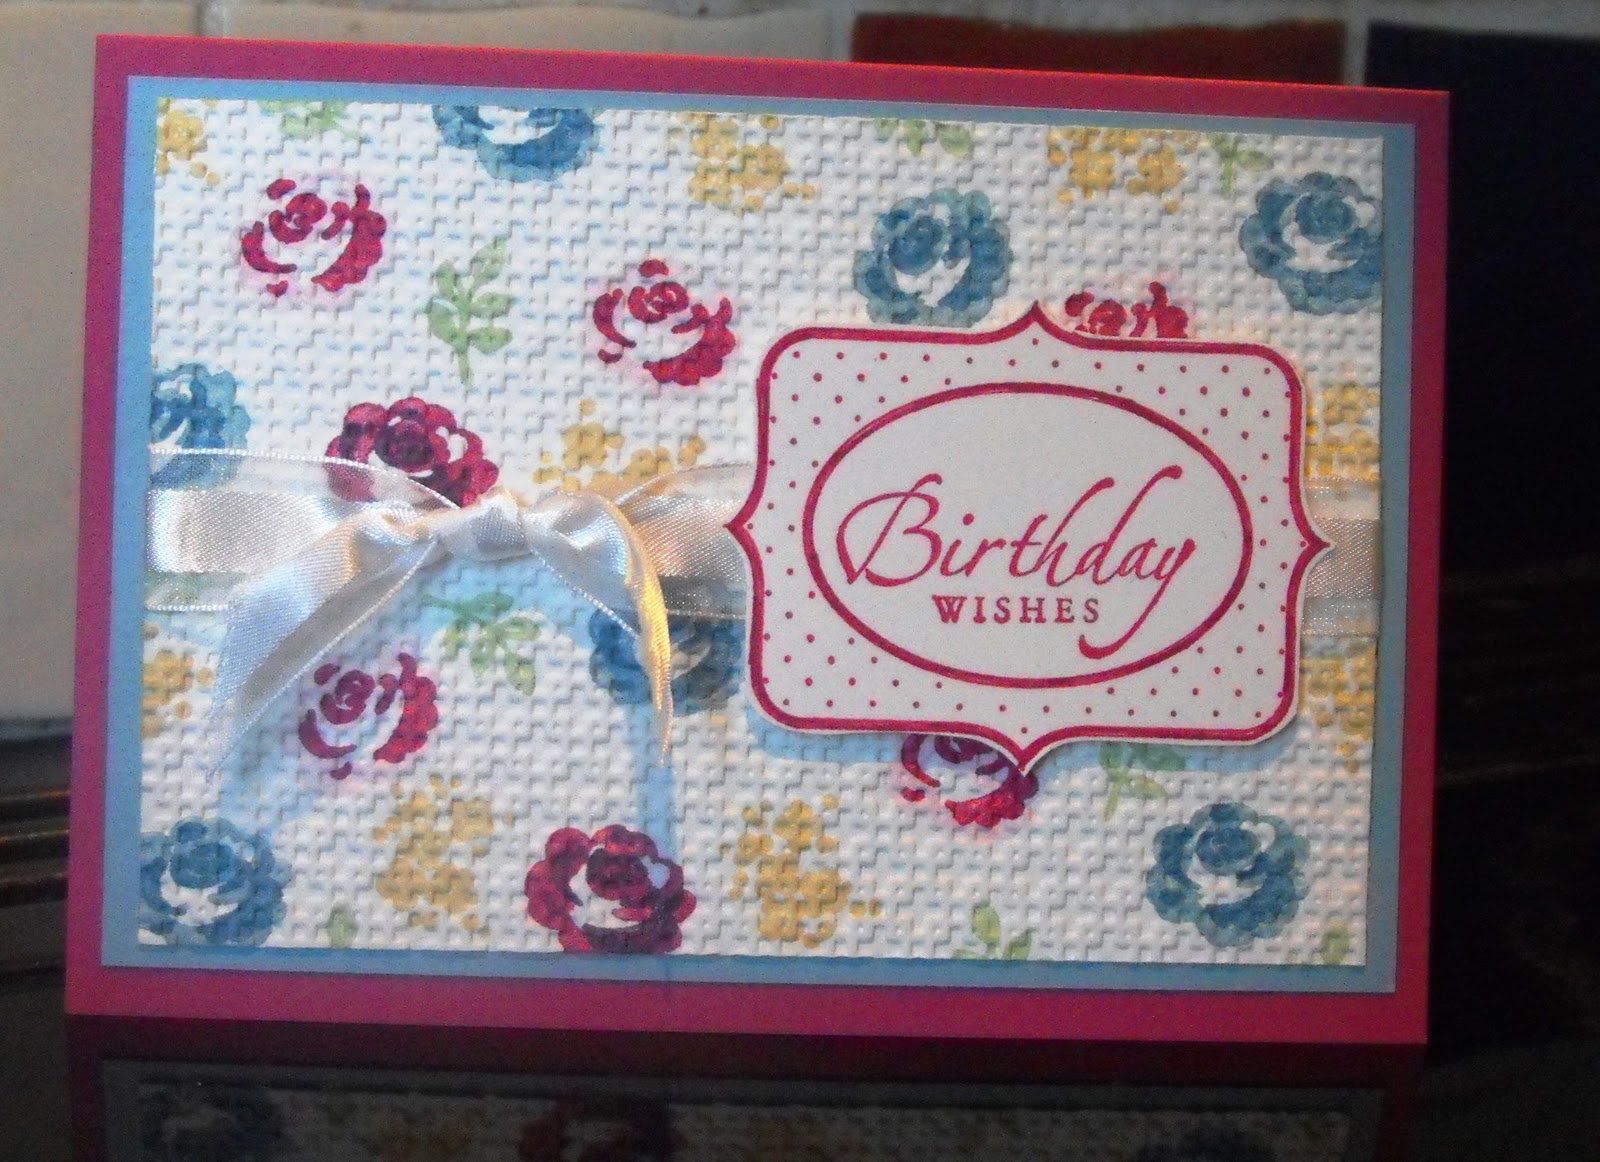
A pretty birthday card today.  The stamp set is Baby Blossoms from the summer mini, a two step stamp set and it is so pretty.  I used marker pens from the subtles series to ink up the stamps, a light colour for the base layer of each flower and then a toning darker colour for the detail.  Once  all the flowers and leaves were in place I used the textured embossing folder in the big shot.  This folder is great, it makes your paper look and feel like a piece of fabric.  I matted onto Baja breeze and then onto the card base of rose red.  I also used rose red ink for the greeting (sincere salutations stamp set) and the frame which I then 3d mounted over the top of an organza ribbon sash.

Thursday, 6 October 2011

Love Hearts


Morning all, what happened to our heatwave then huh?!  It's very definitely Brrrrr round here today. 
This is the last card I have to share from my All Occasions class, can you guess which occasion it might be?!   I would probably use it for Valentines Day but it could be used for an anniversary too I think.
Rose red card stock, designer paper and ink with stamps from the I [heart] Hearts set.  This stamp set is still part of Stampin Up's excellent value starter kit and if you join me during October then there are extra freebies for you too!
I need to get back to making my swaps for the forthcoming team training day on the 15th now.  More tomorrow :)
Related Posts Plugin for WordPress, Blogger...